Its Here!
Let me firstly explain why I have chosen the 8th to release this BOM first block to you all.
On this day in 1919 my father was born, he left this world nearly 11 years ago. Whilst I miss him daily, I look around and smile at all of the little anecdotes and quips he has left me with and it makes me remember all the times we had with great fondness.
So now lets get to the BOM!
I have decided to do one of the most traditional blocks known and one that everyone can achieve great results and on its own it makes a wonderful quilt. I am talking about the 9 patch block. I was traditionally made with 5 dark colours and 4 light colours or vice versa.
This block was made as it was portable, quick and made up into wonderful quilts for the people moving west. Talking about moving, I thought we would take a journey with this block as see what we can create keeping this block in mind. The 9 patch is the common link in this BOM but we will look at lots that have derived from it and make them. For this the first one you may wish to make one keeping it neutral so that later on we can add appliqué on it saying BOM 2016.
So lets look at what we need. Now you know your block you can decide on the fabrics you will use. You can also decide to do this on machine or by hand. I have done both. I have made the blocks 12" finish so after they are sewn here they will measure 12.5" leaving the .5" for the seam allowance when sewing into a quilt.
 |
| both machine and hand pieced blocks |
 |
| final layout for machine pieced |
 |
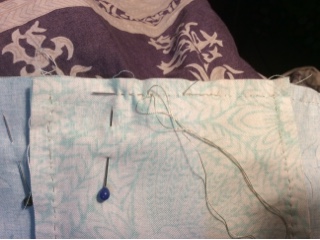
| layout for hand piecing block |
For your block you will need to cut out 9 pieces each at 4.5" decide if you want to use only two or three colours. You can play with the colours as I have done to see what you like best. If you want to test your lights and darks change your photos to black and white mode.
-firstly lets look at the machine pieced block:-
Now let the fun begin, please if I have left anything out just ask, and be sure to post this on the Wehago Designs Quilting Community Facebook group or on Instagram with a #WDBOM2016, I look forward to doing all of the variations of this block with you and building on the skills you have. I am so excited to see everyones creations. Remember if you do not want to make a whole quilt of them just make a placemat or a bag, even a table runner. All I suggest is we have fun and create together.
Ok everyone, lets go and have some quilt stash fun!
Waiting on you blocks,
Wendy.


Hello Wendy, why do you make your stitch shorter when using the machine? curious - never heard it before except when paper piecing. regards Debi
ReplyDeleteYes just a bit shorter than normal, not as short as I do when paper piecing, it means it's less likely to undo at the seams.
DeleteI've often thought about that - might start trying it out - I'm definitely going to do this BOM - thanks heaps Wendy - very good instructions. Where are you based?
DeleteI'm in south Gippsland, Victoria, Australia
ReplyDeleteexcellent - not too far away!
DeleteDo you sew the seam allowance down when you hand piece or do you just stitch thru it leaving it free to fall either way?
ReplyDeleteI just sew through so that it is free and will fall either way, I haven't been able to edit to let everyone know
Delete